How to add your company logo in Salesforce

Here is the simple steps to add your company logo into your salesforce account
Before get into the steps we need to upload the image/logo into your salesforce account, you can able to upload the image under documents tab

Just login into your salesforce account,

  • Go to yourname --> setup -->appsetup -->Customize-->homepage component 
  • Under the custom component click New and then click next 
  • Give the Name as Logo and select the type as image, click next
  • Click the insert image button and select the image/logo file
  • Then click save
Now we are successfully uploaded logo into salesforce, next step is we need to enable the custom component in the home page layout
  • Go to yourname --> setup -->appsetup -->Customize-->homepage layout
  • Click edit the layout
  • Then select our component after that click next
  • Move our custom component in the top of the left side column
  • Then click the save button  
That's it, We are done! Company logo is added into your salesforce account click the Home button.

Comments

Popular posts from this blog

Avoid Duplicate Records Using Flow

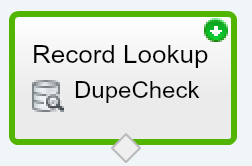
In this blog post lets see how to avoid duplicate records in Salesforce using the powerful feature – Flow , As the word says, flow easily flows to fulfill the requirements with ease. ☺  Many think of appexchange solutions and source code to avoid the duplicate record in salesforce, But the method I'm going to explain here is completely different and very simple. It helps you to reduce your code and can easily rebuild for other objects with different field logic with simple clicks. Lets jump into the solution, we will use flow to check duplicate record logic and use apex trigger to initiate the Flow whenever a record is created or updated. Visual Work Flow : [Click] First we will create the Flow to check the duplicate records based on the name and store the result in the variable. In this example, we will use the Account object for the dupe check. Step 1  : Create a new visual flow with the Name ‘ DuplicateAccountCheck ' Step 2  : Click and drag the RecordLookup into t

Plan your Dreamforce with “Dreamforce Trail”

Salesforce has many good resources for anybody looking to begin Salesforce as beginner, Intermediate or Advanced. Trailhead is also one among the good resource to learn salesforce and my favorite too. I have also written blog post about Trailhead & my favorite module   This  blog post covers an interesting and helpful Trailhead module. Yes Its all about ' Dreamforce Trail ', if you are a Dreamforce Attendee, then I strongly recommend you to take a look into this Trailhead module. No Admin skill or No Developer skill is required for this module.Start winning Badges and is gamified so it motivates you to reach more badges and finally you end up gaining knowledge on Salesforce. Why do we have Dreamforce Trail module in Trailhead?  To help people who is coming to dreamforce for the first time and to plan well for the events. Dreamforce is a tech feast for anybody. Dreamforce is salesforce festival. If you don’t plan well, you will miss something highly helpful . This Dre

Export records from List view – ListView API

As part of the Winter’15 release salesforce introduced the List View API features which helps us to get details and records of list views for an object. I was started exploring more about the List view API and trying to build an use case using that. So I searched about List View in the IdeaExchange site then found that many users are looking for a solution to export records to excel directly from the list view. I built a solution for that Idea, which helps user to download all the records directly from the List view for both standard and custom object. You don’t have to make any change in the code to use this functionality for different objects. All you need is to create a custom button for that object as mentioned below. Lets take an example for Account object 1. Go to Setup –> Accounts –> Buttons, Links and Actions 2. Click ‘New Button or Link' 3. Enter  Label, Name and select display type as ‘List Button’ 4. Content source as “Onclick Javascript” and paste the